GitHub Issue Types (Public Preview)
Issues are the way to plan, discuss and track your work inside GitHub. GitHub introduced a significant evolution of Issues, one of the most exciting being the new Issue Types feature.
Issue Types enables you to classify and manage different types of issues across all repositories in your organization.
Issue Types are currently available in an opt-in beta for organizations. To add your organization to the waiting list, sign up here Join the GitHub Issues Waitlist
In this blog post, we will Learn more about Issue Types and how to manage them in your organization.
As an organization admin, you can customize the Issue Types for the organization by adding, editing, disabling, or deleting them.
Adding an Issue Type
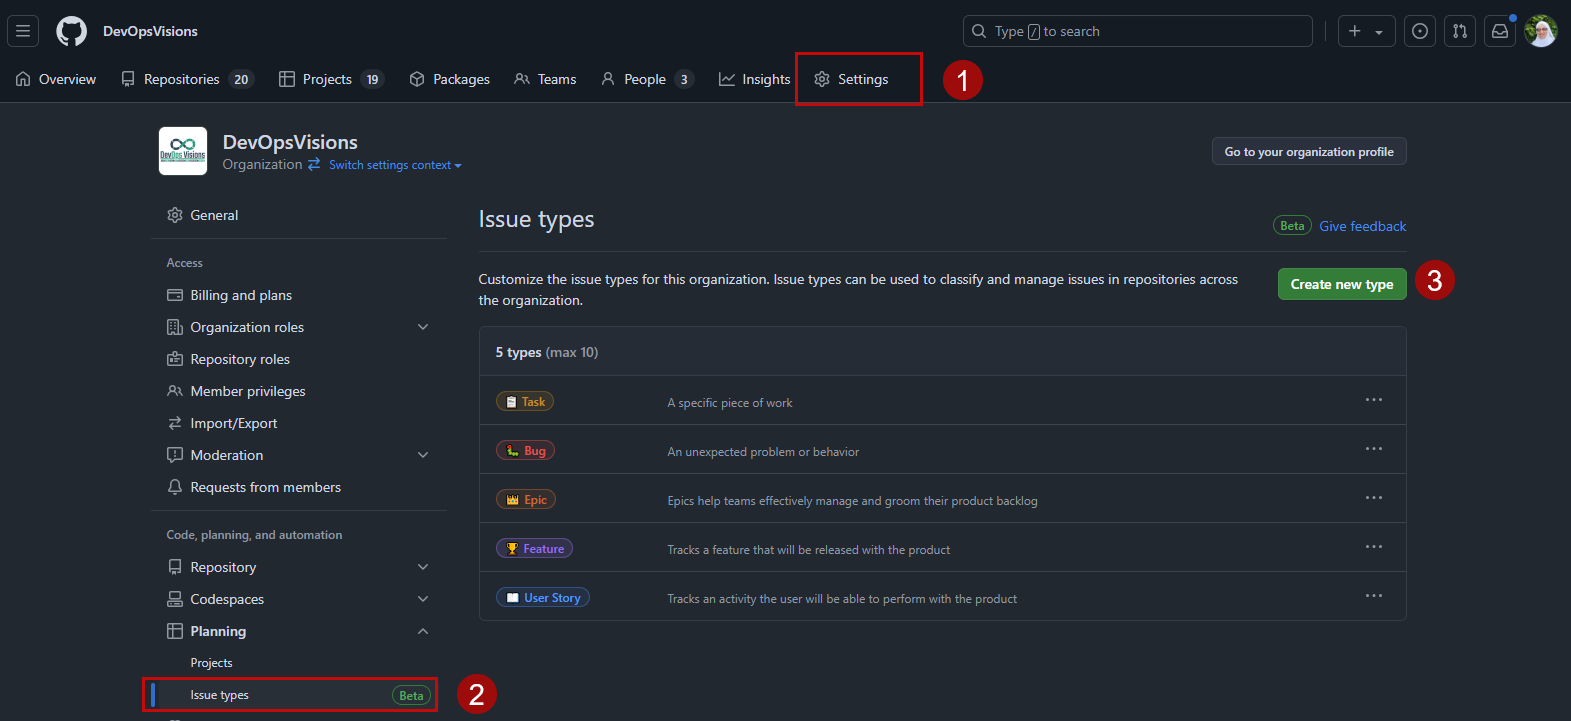
- Click Settings within your organization
- In the “Code, planning and automation” section, select Planning, then click Issue Types
- On the right-hand side, click Create new type
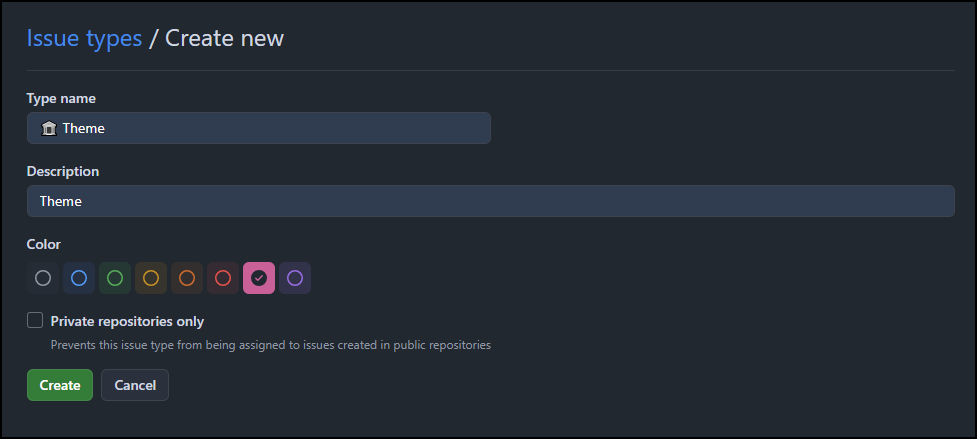
- Under “Type name”, add the name of the new Issue Type
- Under “Description”, add a description for the new type
- Under “Color”, select the color you would like
- If you would like to prevent this new type from being assigned to issues created in public repositories, click Private repositories only
Click Create
Making changes to Issue Types (Edit, Disable, Delete)
Editing an Issue Type
You can edit Issue Type, by changing it’s name, description, color, or restricting its use in public repositories.
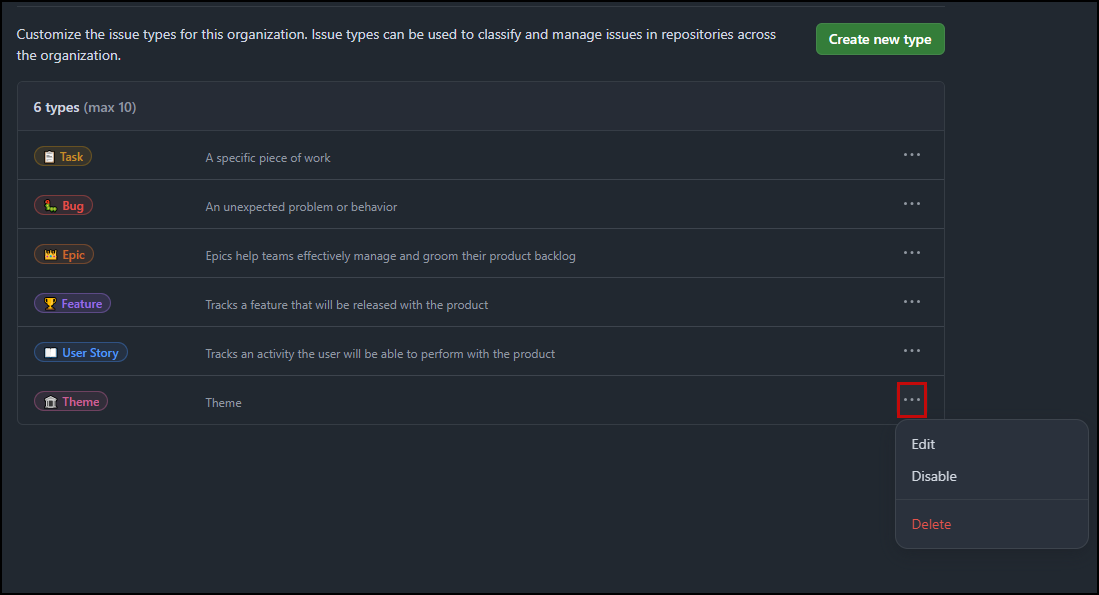
- Click the tree dots (…) of the Issue Type, you would like to edit
- In the menu, click Edit
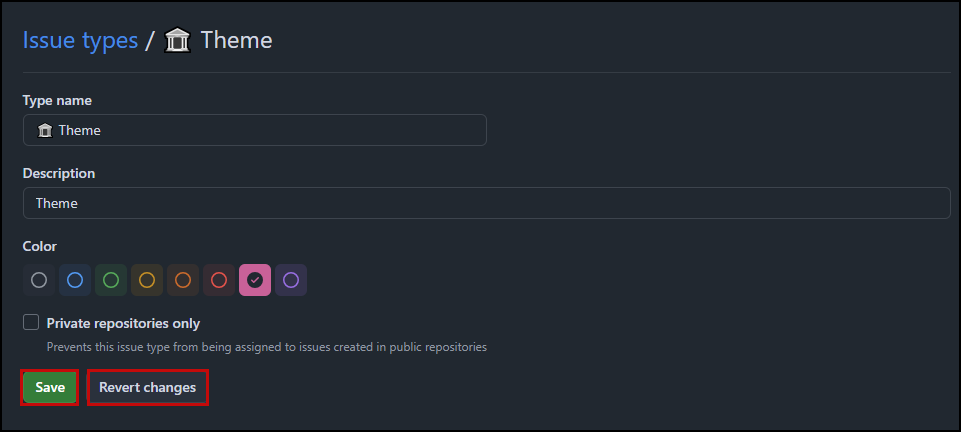
- Edit name, description, color, or public repository visibility
- Click Save
If you want to discard any changes, click Revert changes
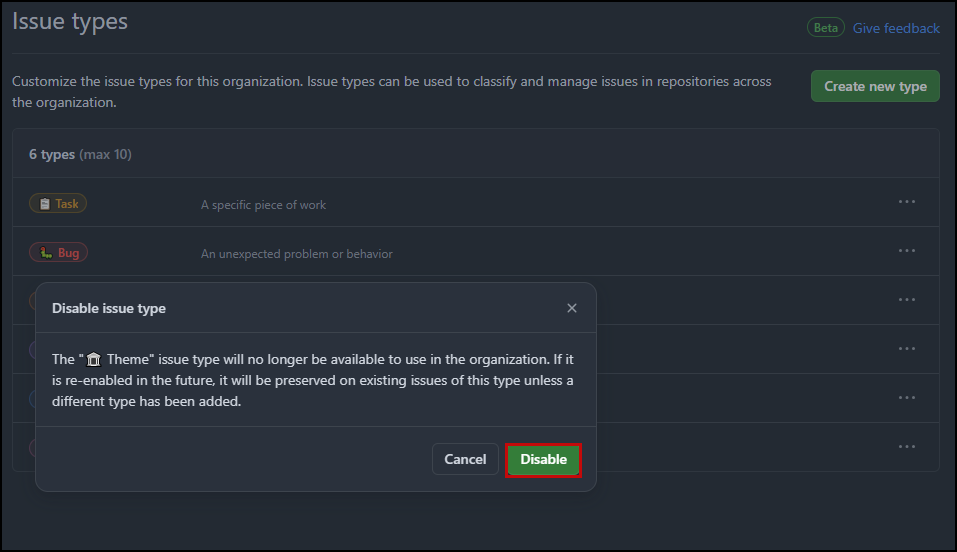
Disabling an Issue Type
If an Issue Type is no longer relevant, you can disable it. Once you disabled, it will no longer be available to use across your organization. If you re-enable it in the future, it will be preserved on existing issues of this type unless a different type has been added.
- Click the tree dots (…) of the Issue Type, you would like to disable
- In the menu, click Disable
Confirm by clicking Disable in the prompt
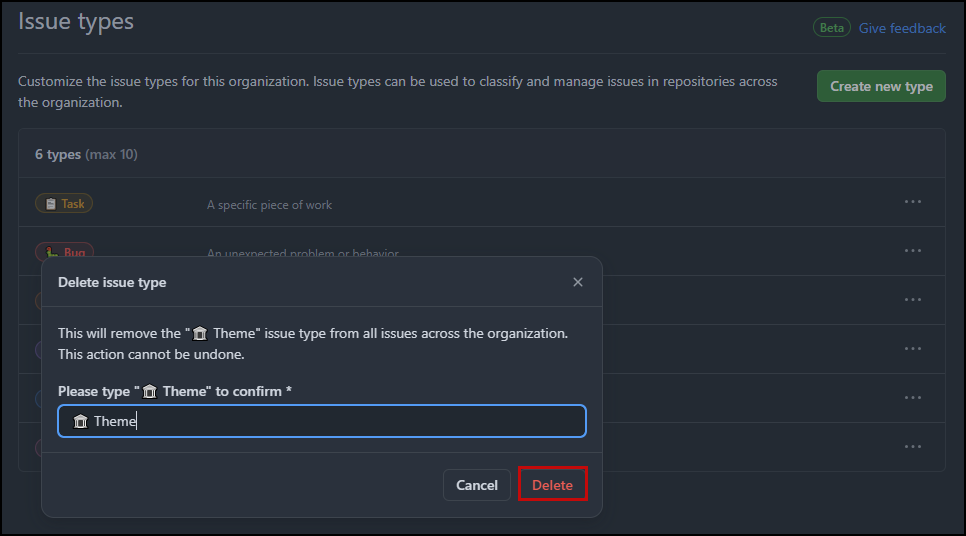
Deleting an Issue Type
If an Issue Type is completely obsolete, you can permanently delete it. Once you delete it, it will be removed from all issues across the organization.
- Click the tree dots (…) of the Issue Type, you would like to delete
- In the menu, click Delete
Confirm by clicking Delete in the prompt
Once you delete the Issue Type, it can’t be restored
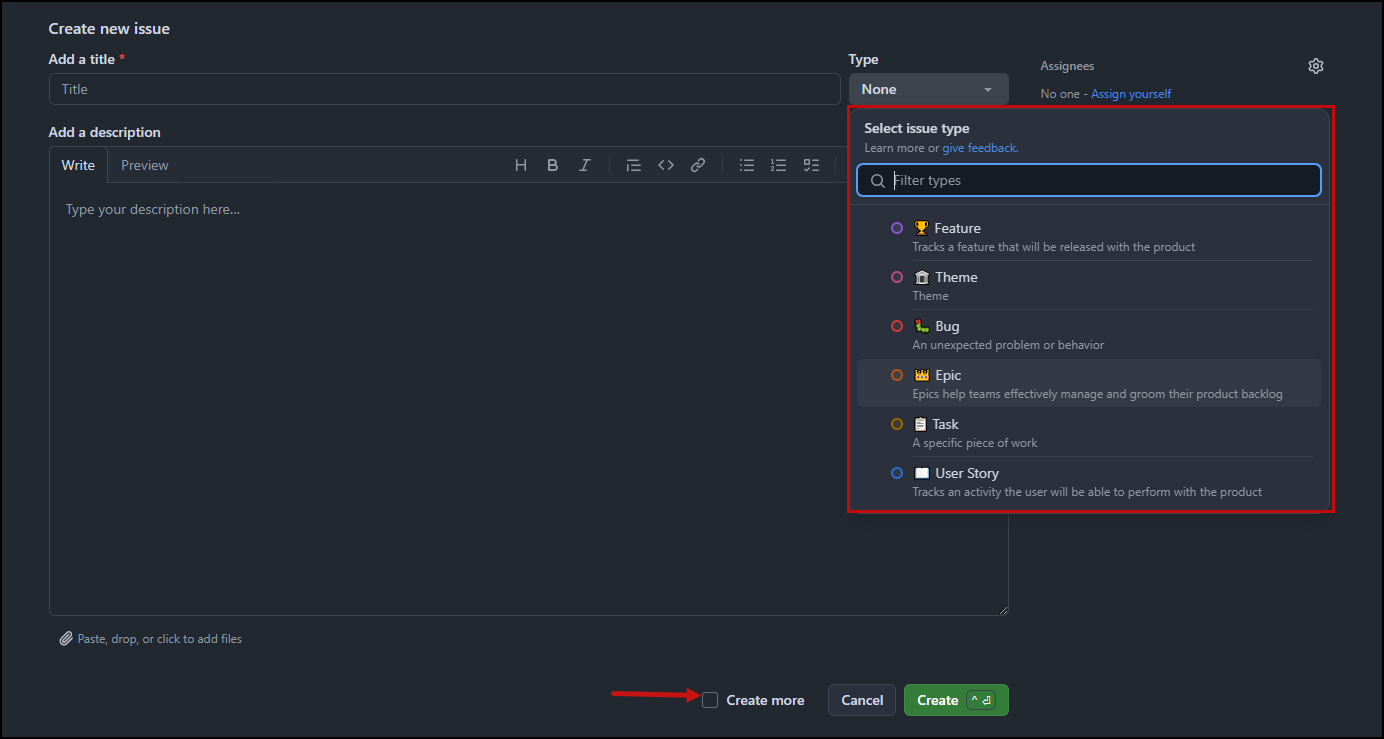
Adding a Type to an Issue
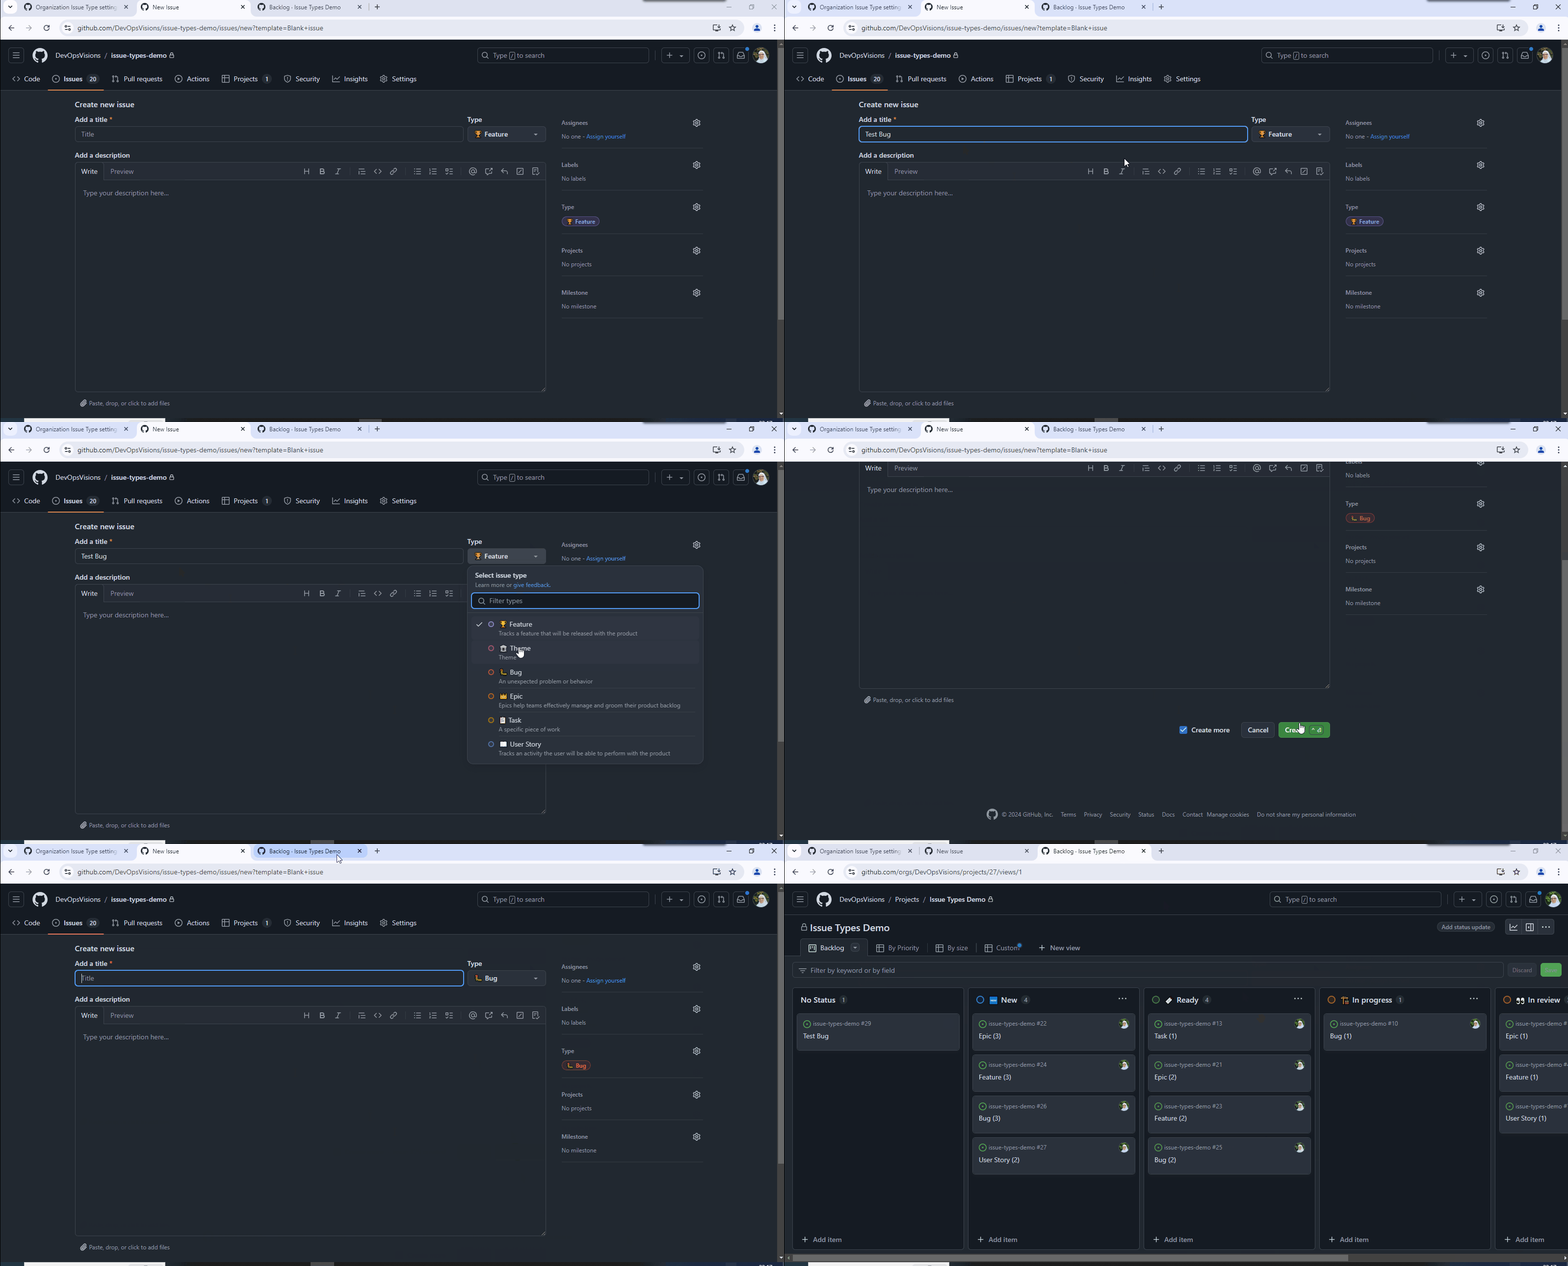
When creating a new issue, you can easily assign an Issue Type:
You can use the new Create more button to quickly create multiple issues without being redirected to the issue details page. This feature keeps you on the issue creation page, enabling you to efficiently add multiple issues back-to-back.
Changing Issue Type
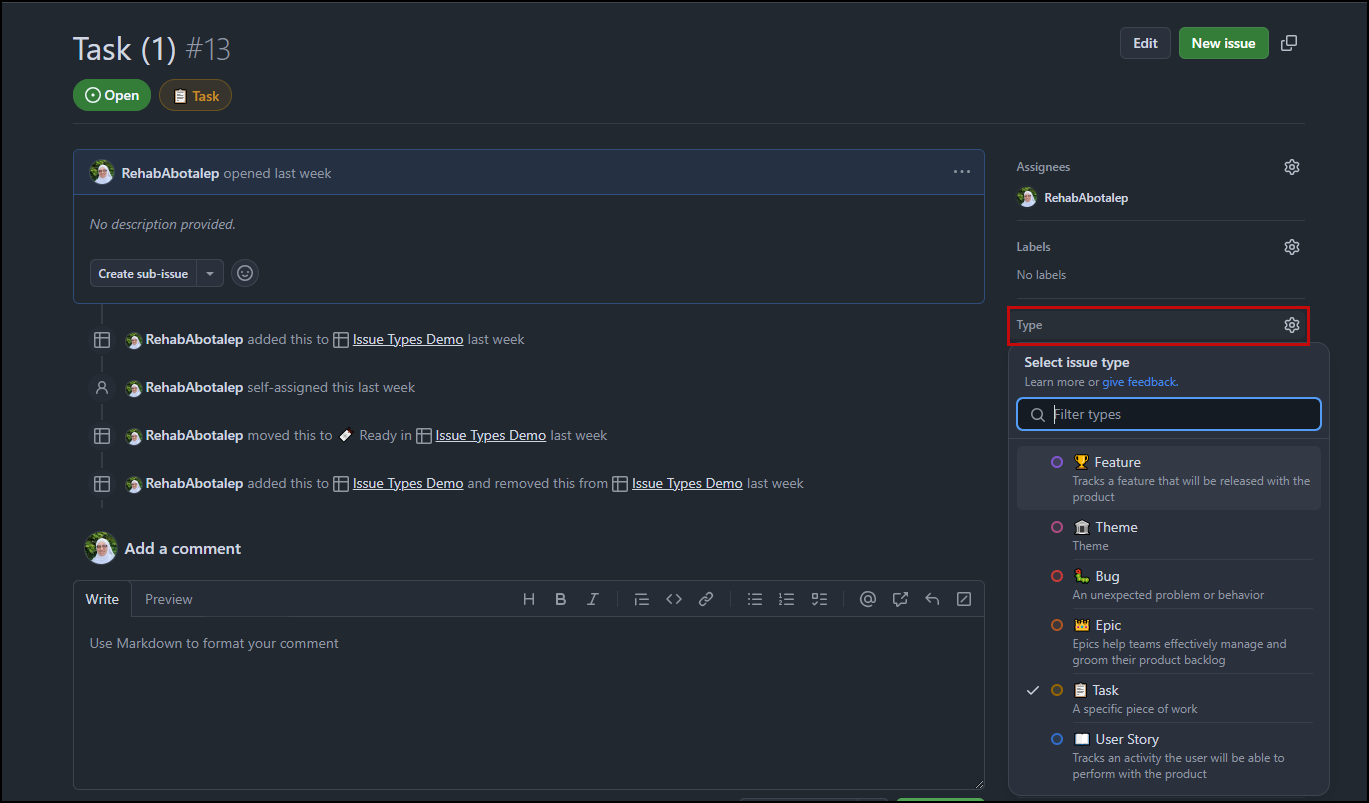
To change the Issue Type for a single issue:
Open the issue, click on the
Typedropdown menu, and select the new Issue Type you’d like to assign.
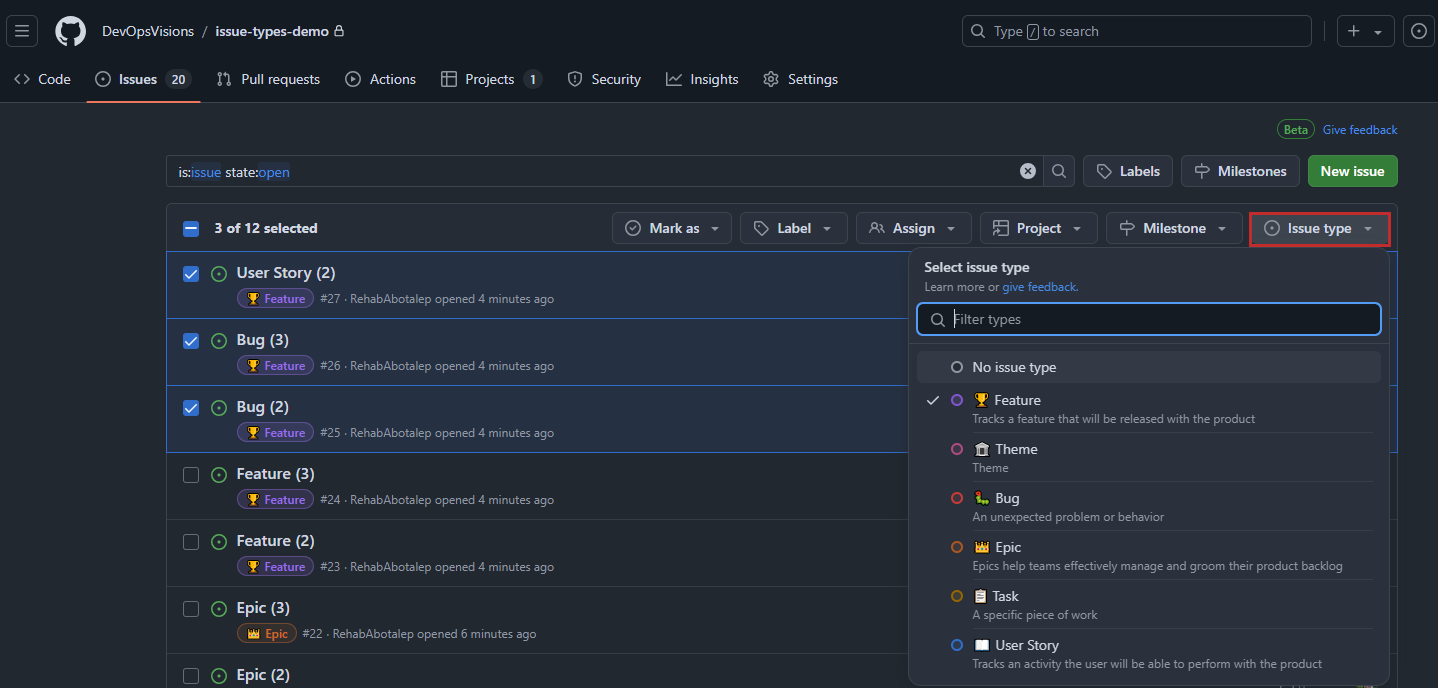
You can also change the Issue Type for multiple issues at once:
Select the issues, then from the
Issue Typedropdown, and select the new Issue Type you’d like to assign.
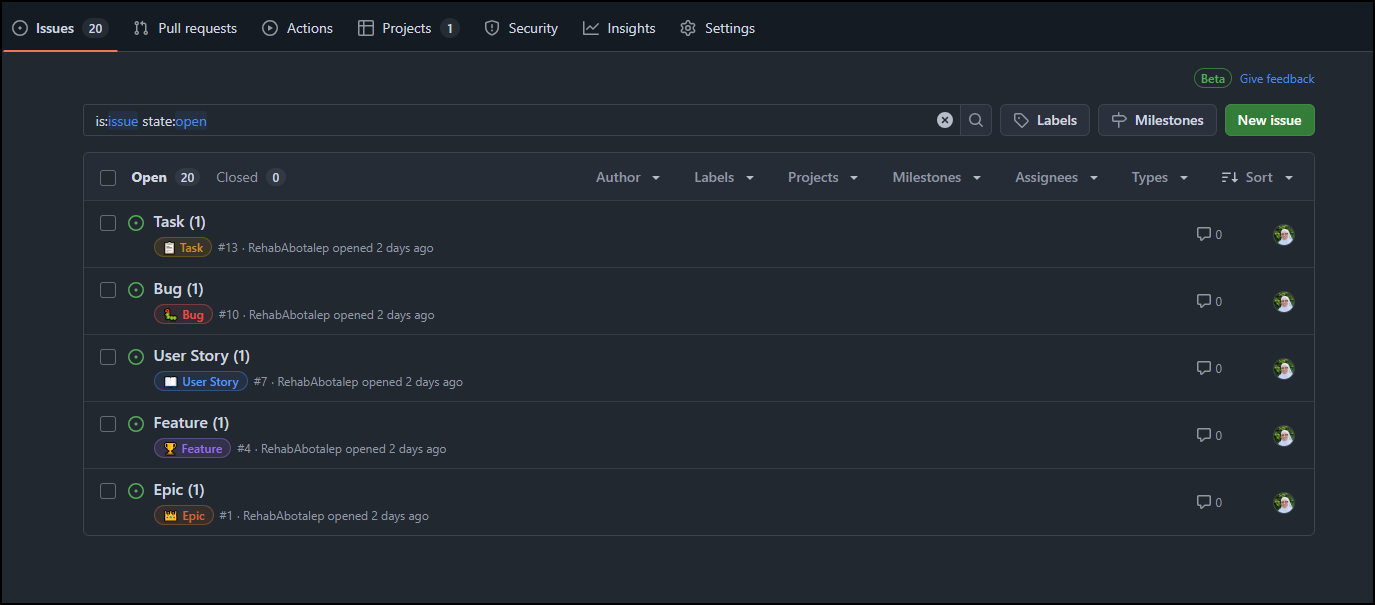
Filtering Issues by Type
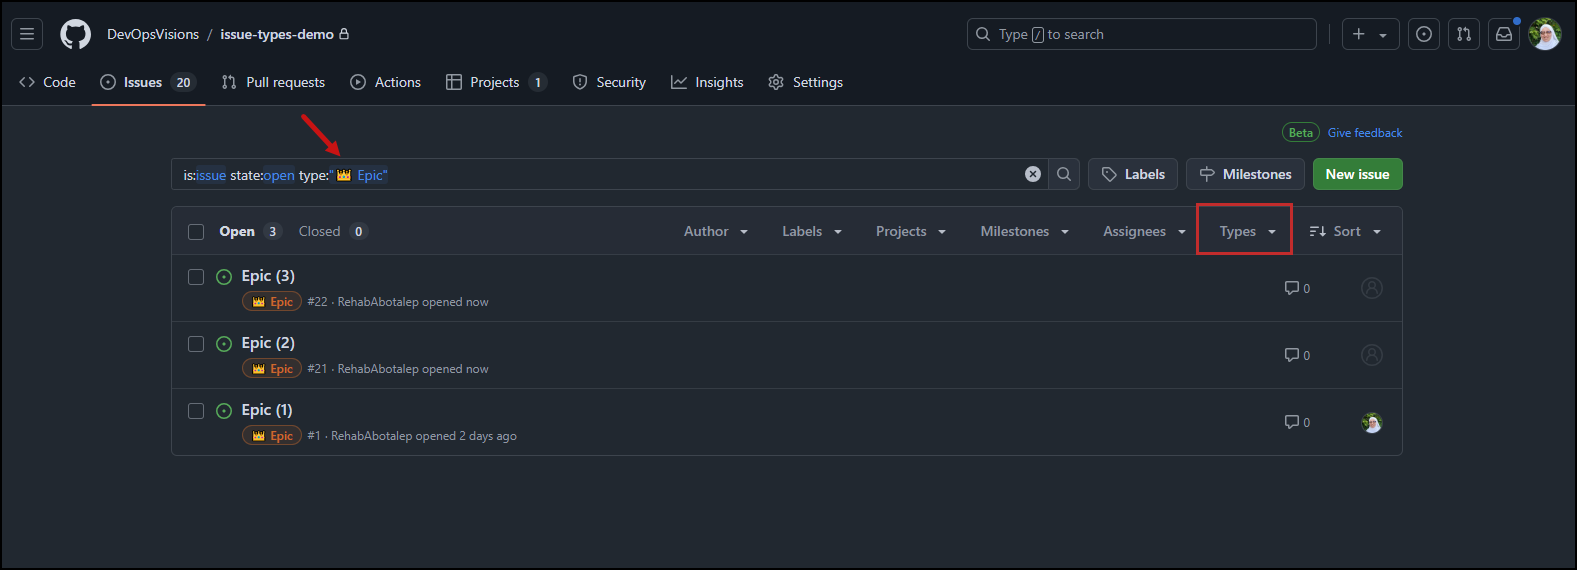
You can filter issues by their type to quickly find and manage relevant issues. In the issues view, use the Issue Type field to apply this filter.
- From the filter bar, type
type, then select the desired Issue Type. Alternatively, use the
Typesdropdown menu to select the type you would like to filter by.
Creating custom views in your project
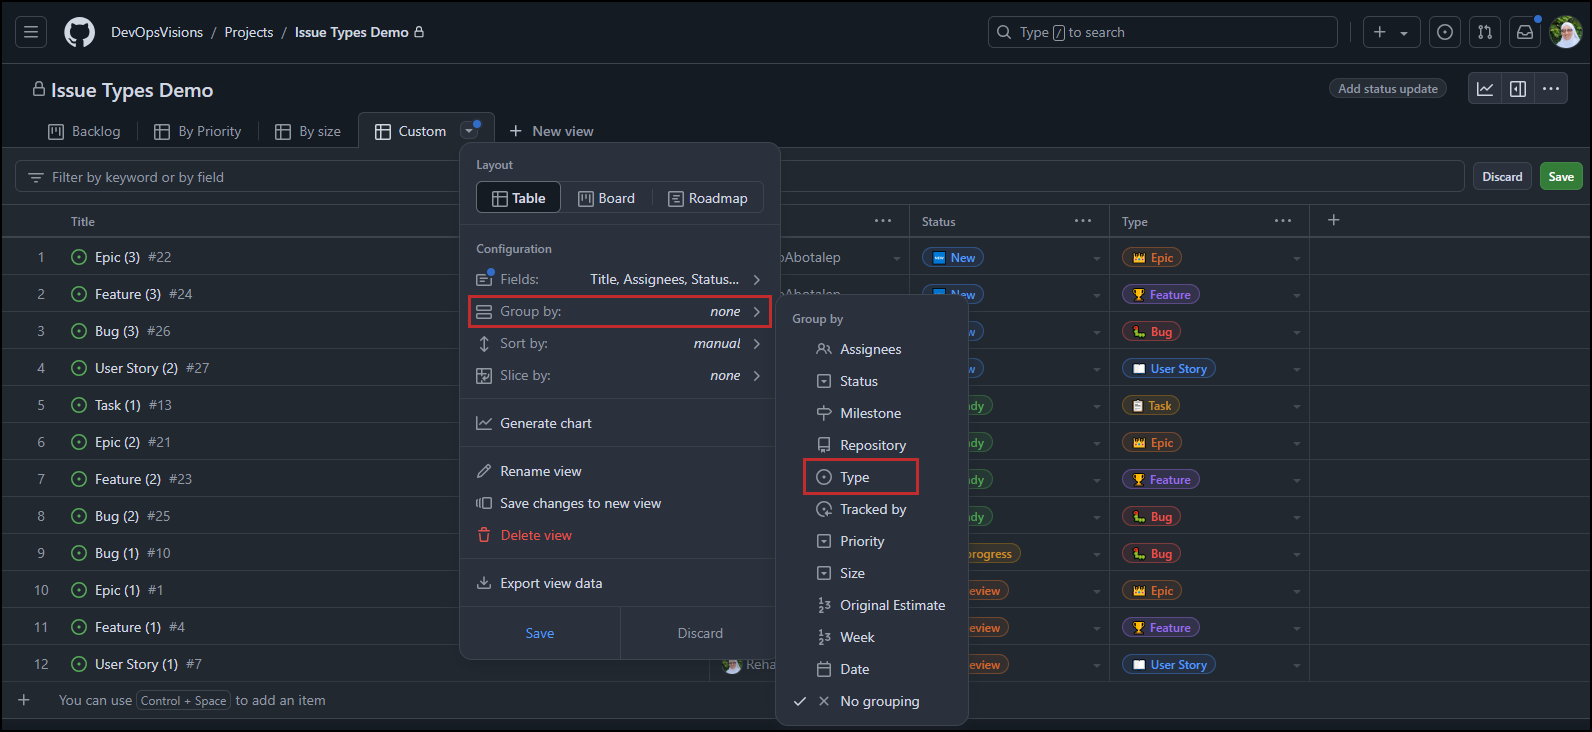
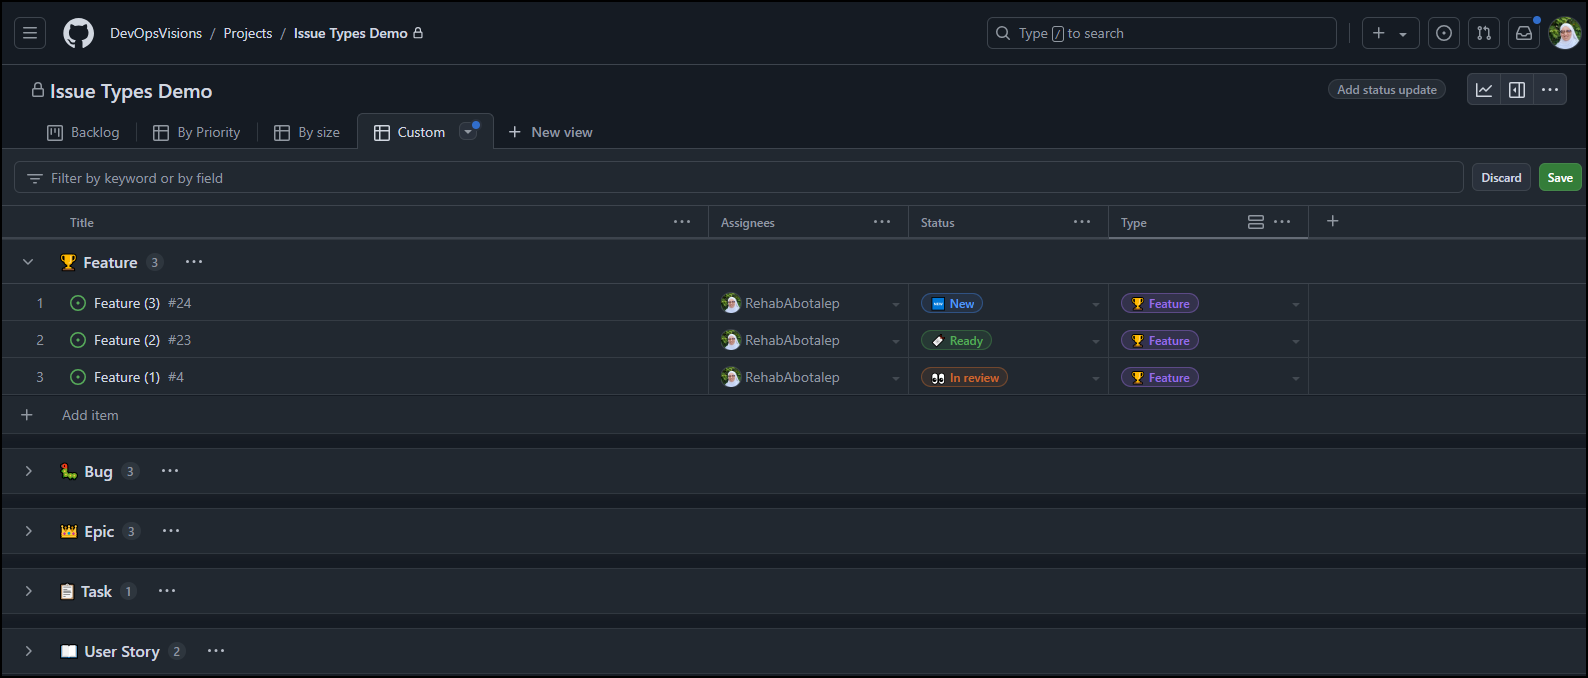
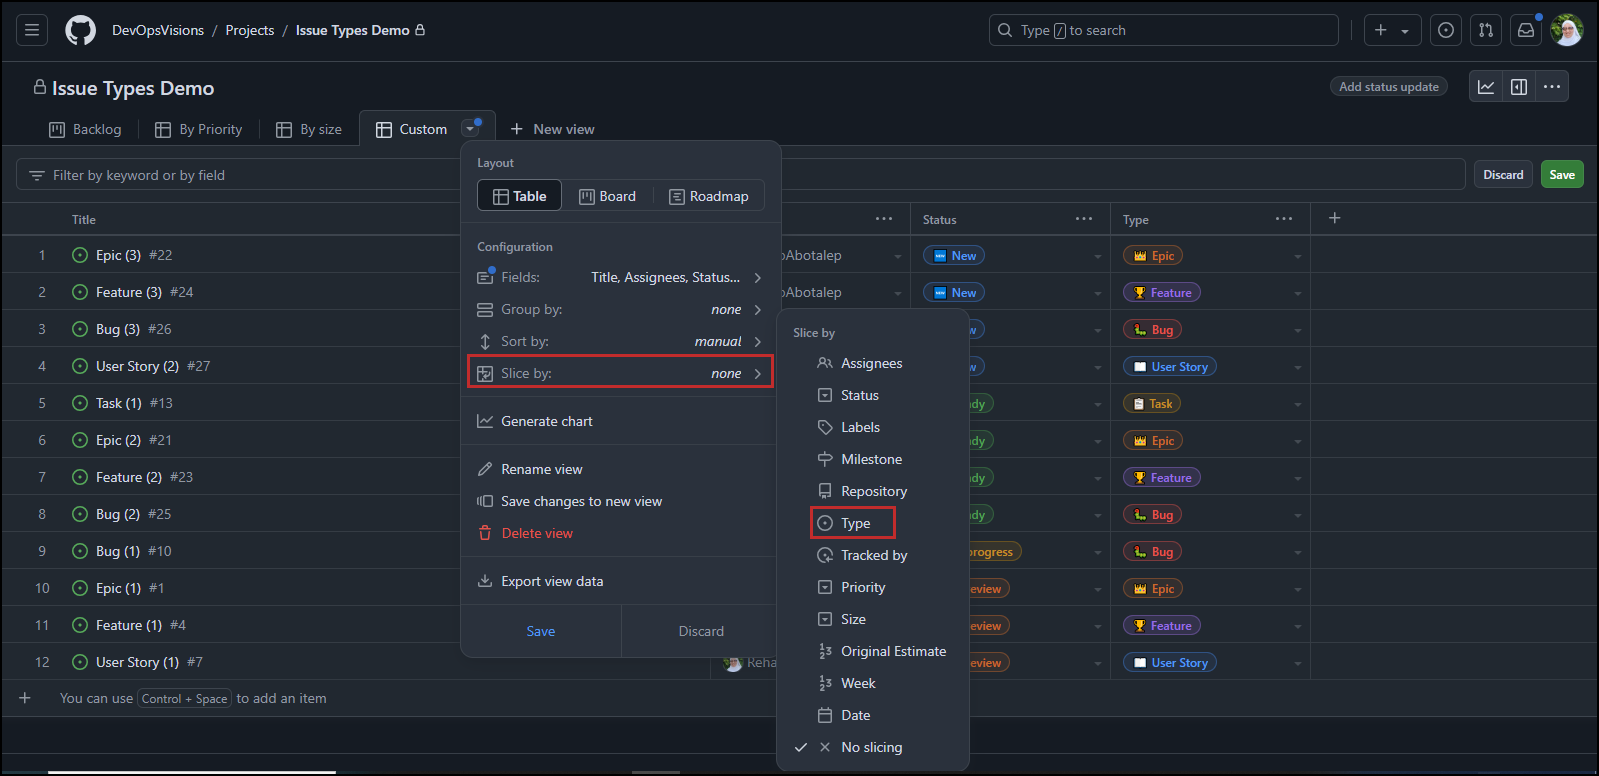
You can customize your project views by using the new Type field to filter, slice, or group issues based on their type.
Group by Type
Slice by Type
Auto-add to project workflow
You can set up a workflow that automatically adds issues to your project based on their type:
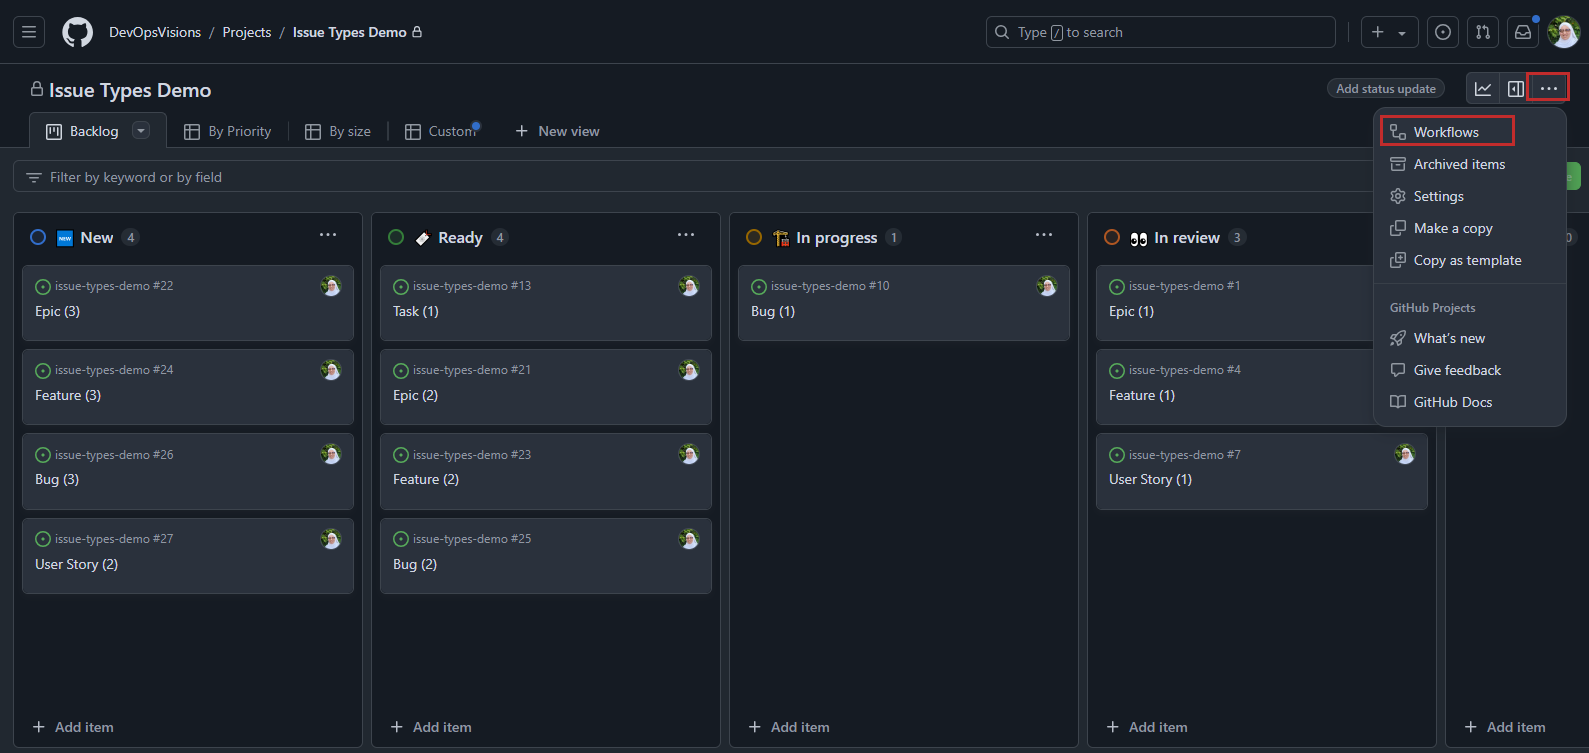
- Within your project, click the three dots (…)
Click on Workflows
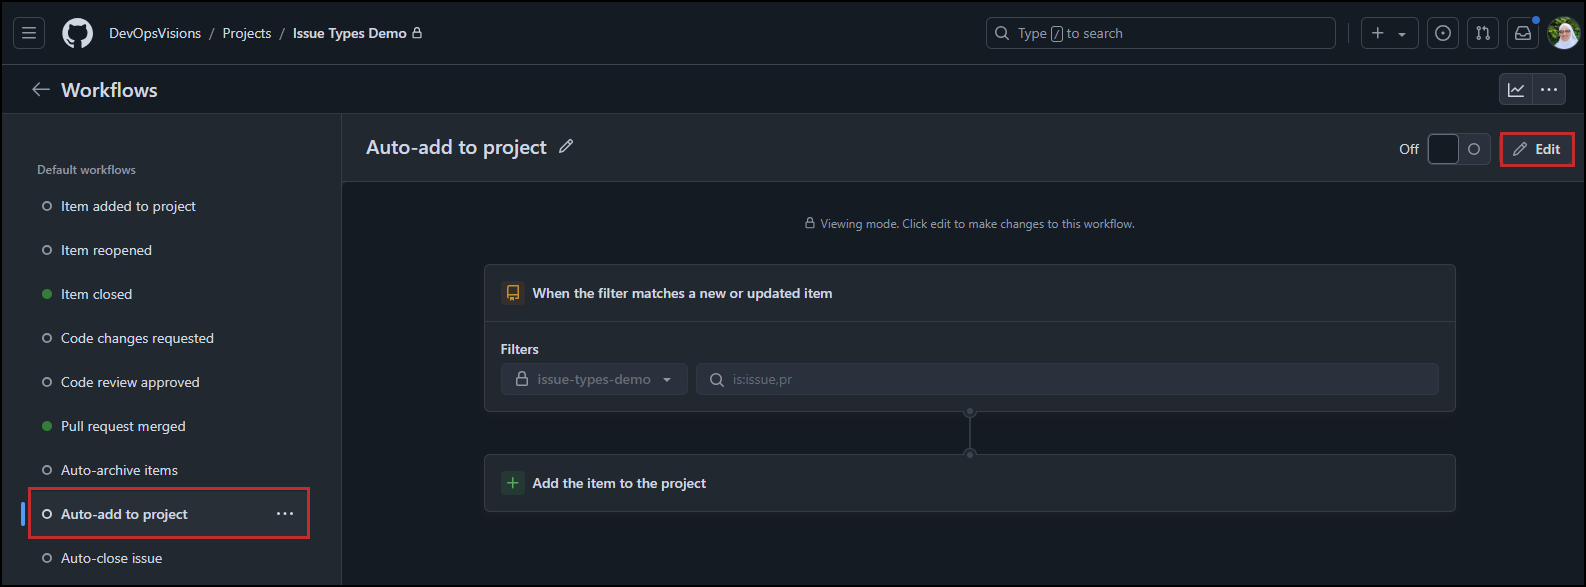
- On the left, under the list of default workflows, click Auto-add to project.
Click Edit
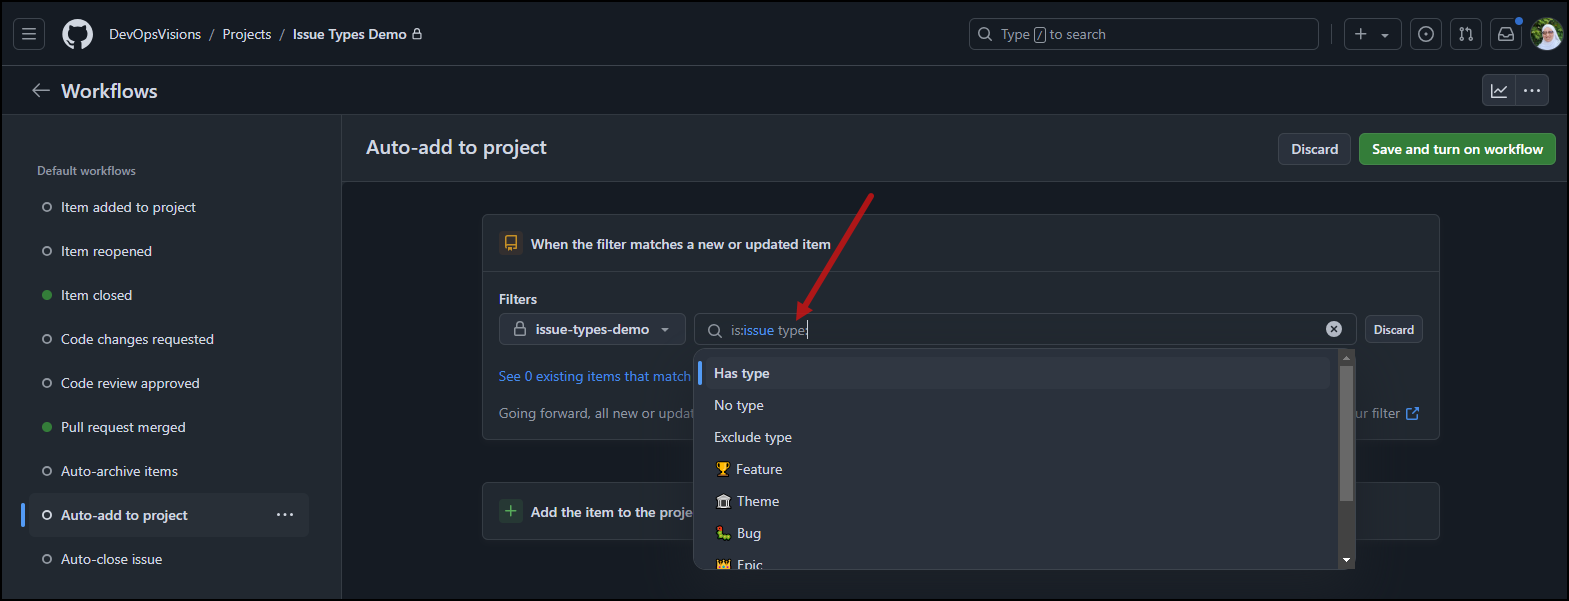
Inside the filter input, type
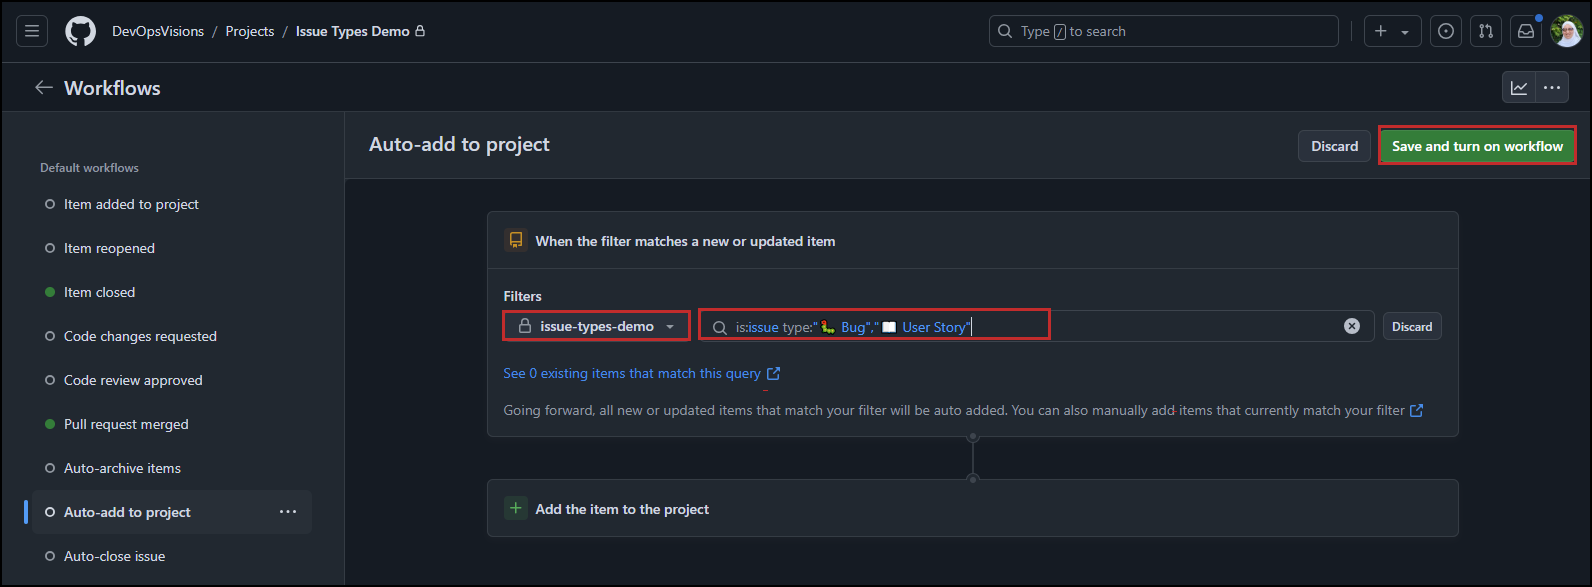
Type, then select the Issue Type you would like to filter by. You can filter byHas type,No Type,Exclude Type, or select a specific type.Click Save and turn on workflow
Example: If your filter is set to
is:issue type:"Bug", this means whenever you create a new issue of type Bug in your selected repository, that issue will automatically be added to your project.
Conclusion
The introduction of Issue Types in GitHub marks a significant improvement in how teams can classify, manage, and track their work.
If you’re interested in trying out Issue Types for your organization, you can sign up for the public preview.
You can watch the following video that walks you through all the steps explained in this post.
